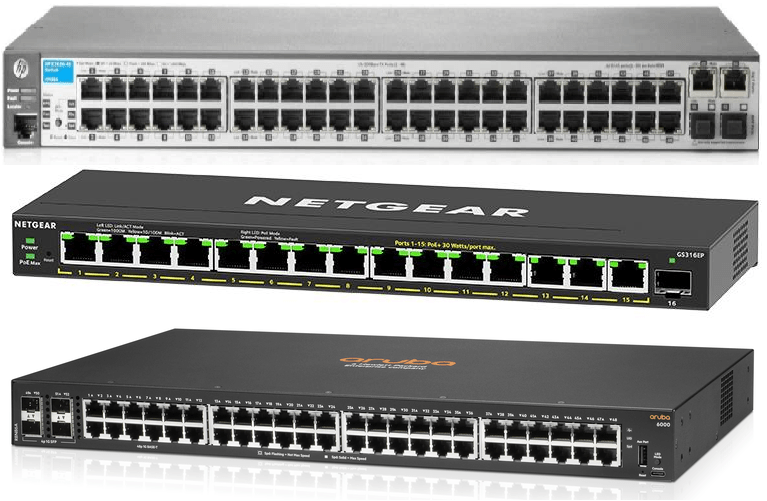
One thing that has always helped me to understand Networking as a whole, has been that devices will always need a means of communication to share their resources and exchange data with each other. This is no different from a switch and is imperative in our setting up of a Network Switch from factory.
Remoting into the Switch
All HP, Aruba and NetGear switches will all come with a default IP Address from the box of which should be inside the instruction manual. Once you have identified your default IP (keep note of it as it is important), you now need a way to remote into it and to do that, you will need a computer or a laptop with an ethernet port. Disconnect your device from the internet and plug in an RJ-45 cable from the device into the switch but remember, it is important that you plug in to a port in the switch which will be your uplink port (preferably the last ports on the switch). Once you have the switch plugged directly into your device (and ensured your device is disconnected from the internet, you will need to change the IP address on your device.

Changing your Static IP Address
There are two places to change our Static IP Address but only one of them seems to work. Avoid changing your IP Address in the new style Windows Menu like below:

The correct location is found by right clicking your Wi-Fi or Ethernet symbol and clicking ‘Open Network & Internet Settings’, then choosing the option ‘Change Adapter Options’.

Once in, right click your plugged in Ethernet cable and choose ‘Properties’, scroll down and look for Internet Protocol Version 4 (TCP/IPv4), press it and then open ‘Properties’ once again.

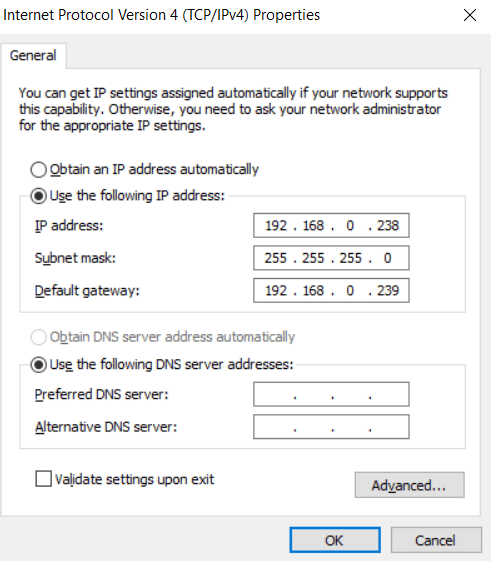
You will then be given the option to change between automatically obtaining an IP and to ‘Use the following IP Address’. Choose the second option and fill out as below:
It is important that you are disconnected from any sort of internet connection during this process as you are going to be assigning static IP’s and if you happen to assign an IP address already in use, this can cause serious network issues.
IP Address: As mentioned above, remember that every factory Switch will have a default IP Address. In this case let’s go with the NetGear which is 192.168.0.239. The IP Address you are entering must be different from the switches IP Address but must be on the same Subnet, so you can go with 192.168.0.238 for your IP address.
Subnet Mask: The Subnet mask will vary depending on your network but in most cases will be 255.255.255.0.
Gateway: The Gateway is very important as it is our way of connecting the devices together. For configuring a Switch, we will always use the IP of the switch we are trying to remote to. So as we explained in the IP Address, we will use the default IP for a NetGear Switch which will be 192.168.0.239.
DNS Server: The DNS Server can be left empty as we do not need it during the set up.
Remoting into the switch
Once you have assigned a Static IP to your device, the next step is to remote into the Switch itself. Open up your internet browser on the device plugged into the switch and input the IP of your switch (192.168.0.239) and press enter.
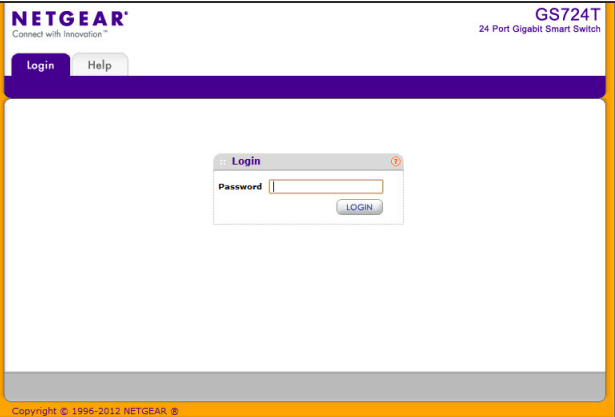
Now it is time to log into the switch and once again, all switches will have a default username and password which you will need to Google. In this case, NetGear switches are usually admin for username and ‘password’ for the password.
Once in, on ‘System’, ‘Management’, choose the option ‘IP Configuration’ to change the IP address of the switch and make it accessible outside of your Local Area Network setup. Choose the option ‘Static IP Address’ and assign your switch an IP Address of your choosing. It is extremely important that you do not assign an already in use IP because as explained, this can cause serious network issues. Your gateway will be specific to your organisation and will be specific for the VLAN that you are using, your organisation should have a set VLAN and Default Gateway for Switches. Similarly, ensure that the ‘Management VLAN ID’ is the same as all other switches to ensure the switch can communicate with switches further down the chain.

Once you click ‘Apply’, note that you will be kicked off the switch so it is important for you to remember the IP address you assigned. Remove the cable from your device and get back on the internet. Once back on, all you need to do is enter the Switches new IP Address into the browser URL and log in.
There you have it, you now have your manually (painfully) configured Switch ready to use and ready to take all your VLAN ID’s.

Leave a comment